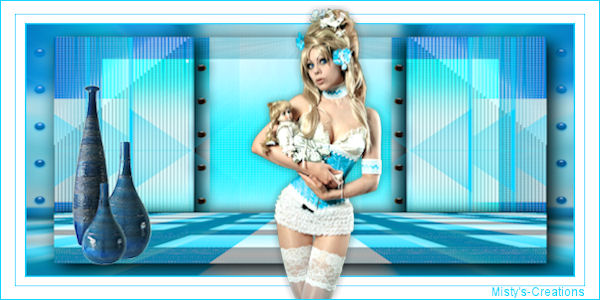

Nova Frame
If you want to use the lessons for m@ilgroups or on clubs, E-m@il me for authorisation. Do not hot-link my lessons. Distribution of documents has been permitted in absolutely no manner! All of my lessons applies ©copyright.

This is tut nr 11, and it's very easy to do :D
(The snapshots where made with Dutch PSP and therefore in the Dutch language)
What you need:
Supply/Filters
FM Tile Tools
Filter Unlimited 2.0
Greg's Factory Output Vol II
Sybia
Xero
Flaming Pear - Flexify
So lets get started!
Open up an image, choose a light and dark color for your foreground and background with your eye dropper.
Selections - Select all. Effects - 3D Effects - Cutout:
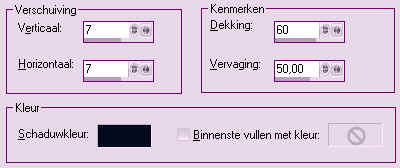
Repeat but set V & H -7.
2.
Add borders - 1 px dark - 3 px
light - 1 px dark.
Add a border of 10 px with the light color, select the border with your
magic wand.
Filter Greg's Factory Output Vol II - Pool Shadow standard.
Adjust - Add noise 10% Even and Monochroom.
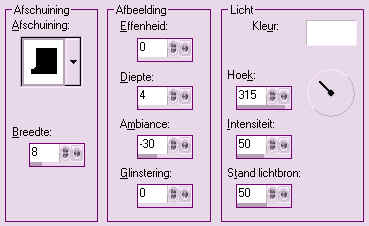
Effects - 3D Effects - Outer bevel with these settings:
Add borders - 1 px dark - 3 px light - 1 px dark.
3.
Add a border of 20px with the light color, select the border with your
magic wand.
Filter Sybia - POLPERV standard.
Filter FM Tile Tools - Blend Emboss standard.
Filter Unlimited 2.0 - Buttons and Frames Glass Frame2 64-128.
4.
Repeat point 2.
5.
Add a border of 30 px with the
light color, select the border with your magic wand.
Filter Greg's Factory Output Vol II - Pool Shadow standard.
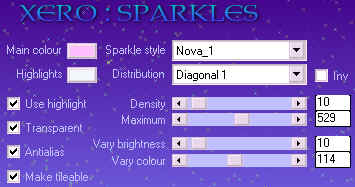
Filter Xero - Sparkles with these settings:
Effects - Edge effects - Enhance.
Ajust - Sharpen.
Filter Unlimited 2.0 - Buttons and Frames - Glass Frame 2 op 64-100
Select none.
6.
Repeat point 2.
7.
Add a border of 40px with the light color, select the border with your
magic wand .
Filter Greg's Factory Output Vol II - Pool Shadow standard.
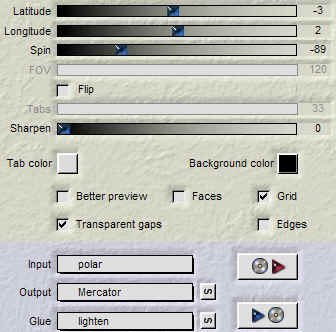
Flaming Pear - Flexify with these settings:
Effects - Textureffects - Blinds 4-55 dark color and light left/up marked.
Effects - Edge effects - Enhance.
Filter Unlimited 2.0 - Buttons and Frames - Glass Frame 2 op 64-100.
Select none.
8.
Repeat point 2.
9.
Resize your creation to the size you want.
Don't forget to put your name or watermark on your creation.
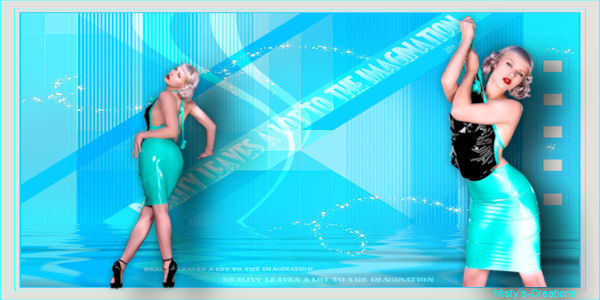
That's it folkes, you created
a new frame :D.
Hope you had fun with this creation.
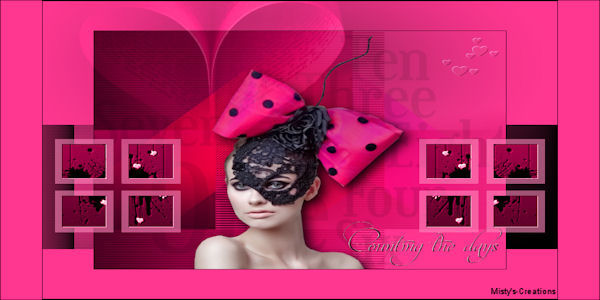
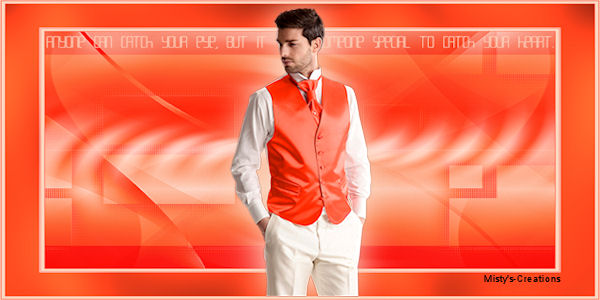
Extra example with animation:
In your layerpallet duplicate your frame twice.
Select the area you want for the animation with your freehand selectiontool
on point to point
(here I did the nails).
Go to your layerpallet and select the first frame.
Ajust - Add noise of 10 Even and Monochroom.
Go to your layerpallet and select the second frame.
Ajust - Add noise of 20 Even and Monochroom
Go to your layerpallet and select the third frame.
Ajust - Add noise of 30 Even and Monochroom
Save as a psp file.
Go to your Animation Shop and open your psp creation, you'll see 3 frames
Save as and click all the way on next and at last on complete..
Your Bling Bling frame is ready now :D
Hugs, Misty